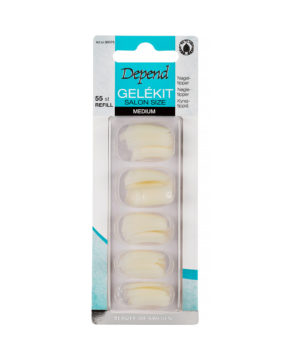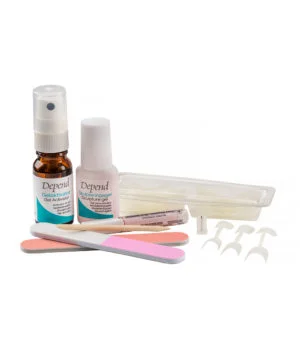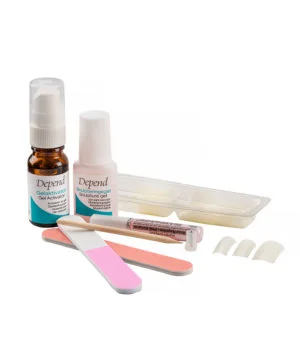
GEL KIT SALON SIZE *NEW*
New! – A new friend of Gel Kit Natural look, with longer tips
A complete kit for applying gel nails with a salon feel at home. A professional set of two different nail tip favourites. The flexible fit and wide bonding surface make tip application easy and safe for a professional-looking result. Pack contains detailed instructions for use.
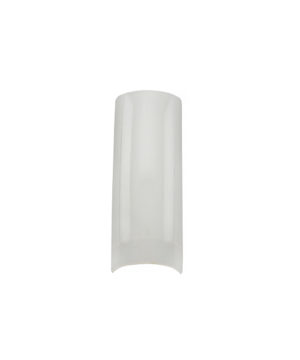
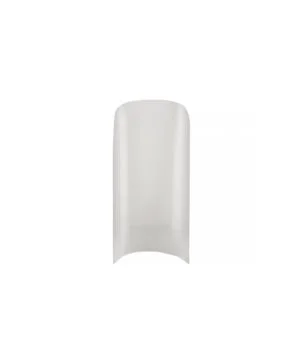
For our newly launched range of artificial nails, we have made completely new tools for creating nails with the perfect fit and look, with inspiration drawn from our most popular styles. Depend Gel Kit has for many years been a favorite with those who prefer to sculpt their own nails or those of friends at home. We are now expanding this segment by launching a new kit with the same contents as before in terms of the gel and activator, but with the addition of longer tips in two models, 80091 Gel Kit Salon Size.
- How to
- Content
- Academy
What to do:
1. Give yourself a regular manicure – start by filing and shaping your nails. Gently push back your cuticles. You can also use a buffer to even out the nail surface. Tip! Use Depend cuticle peeling to remove any dead skin cells along the cuticle and on your nails, as this will help your sculptured nails to last longer.
2. Gently “roughen” the surface of the nail, using surface 1 (pink) on the buffer.
3. Look through the tips so that you get an idea of which ones fit your nails. The tips should cover the nail from edge to edge across. If you do not find a tip that fits exactly, you can always file down the edges of a larger tip, to get a perfect fit.
4. To ensure the best possible surface for attaching the tip, clean your nails with a nail polish remover that is free from acetone and oil; we recommend Depend blue nail polish remover. After this step, do not touch the nail plate with your fingers, as you want to avoid transferring bacteria and grease to the nail and the tip, which might mean that your sculptured nails become detached too soon.
5. Now apply glue to the thin bonding surface on the back of the tip. The glue must be applied right up to the edges. Press the tip against your nail so that the little edge on the back of the tip meets the edge of your natural nail. Take care not to leave air bubbles between the tip and the natural nail. Hold in place until the glue has dried. If necessary, press the edges of the tip onto the nail with the orange stick. Natural Look Shortcut Tip: Do not break the tip off until after it has been applied.
6. Then very carefully file the edge formed between the tip and your natural nail to give a more even transition. Only file the tip, and not your natural nail.
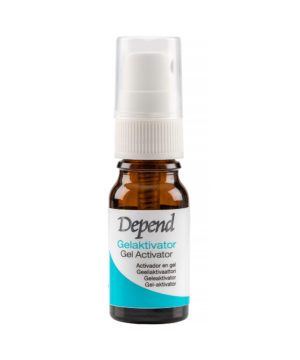
7. Now it is time to apply the sculpture gel and gel activator. (Protect the surface underneath during application.) NB! Begin with the four fingers, and treat the thumbs of each hand last. Apply a thin layer of the sculpture gel over the whole of your natural nail and the tip. Do not let the gel touch your cuticle, as this increases the risk of flaking off, but apply it about 1 millimetre away from the cuticle.
Next, spray one nail at a time from a distance of about 20 cm, pressing once (1 time) per nail on the gel activator spray. (NB! Never use more than a single press on the spray. If you do, your sculptured surface will crackle very easily. So take care that the spray stream only lands on one nail at a time.) When it is completely dry, repeat the same procedure twice more, to make a total of three thin applications of the sculpture gel and gel activator. (NB! Remember to wipe the top of the sculpture gel before you put the cap back, or it may stick permanently in place.)
8. Complete the treatment by buffing the nails with the buffer.
You have now created an elegant, high-shine look with long-lasting results. After about 1½ weeks, file and even out the growth, and then apply more sculpture gel and gel activator – this will freshen up your nails and help them to last longer.
To remove the tips and gel, use Depend artificial nail remover.
You can apply your favourite coloured polish to these sculptured nails. Remember to use a base and top coat. When removing the nail polish, use Depend red nail polish remover to avoid damaging your sculptured nails.
To prevent crackling:
ALWAYS apply the sculpture gel in thin layers.
NEVER press more than once per nail on the gel activator spray.
Last, but not least: make sure that the nail plate is clean and dry before application – this is the key to successful results.
Practice makes perfect! Have fun!
6 g Sculpture Gel, 10 ml Gel Activator, 2 g Pink glue, 44 Nail tips, 1 Orange stick, 2 Nail files
For more useful tips, please visit our knowledge bank Depend Academy
| Product type |
|---|